Building a GenAI-powered Excel Add-in - Part 01 - Getting Started Developing Office Add-Ins
In this tutorial series, we'll build a Generative AI-enhanced Excel Add-in, providing an ideal starting point for those aiming to develop quick and impressive GenAI Use-Cases. We'll utilize Vue.js for the frontend, shown as an Office Add-in within the Microsoft Excel Application. Python and FastAPI will power the backend. We will call the OpenAI GPT Language model, customized with specific instructions to generate the GenAI component.
This marks Part 1 of our tutorial series, focusing on setup and the installation process. By the end, we'll have a functional Excel Add-in capable of colorizing all highlighted cells with the press of a button.
Prerequisites
A Microsoft 365 subscription (including Office on the web).
Node.js v18.18.2 (Visite Node.js site to download and install).
The latest version of Yeoman and the Yeoman generator for Office Add-ins.
bashnpm install -g yo generator-officeVue.js
bashnpm install -g @vue/cli
Generate a new Vue app
To generate a new Vue app, use the Vue CLI.
vue create plot_pilotThen, select the Default preset for "Vue 3".
Generate the manifest file
Each Add-in requires a manifest file to define its settings and capabilities.
Navigate to your app folder (Our App will be called plot_pilot because is automatically creates Plot for your data)
bashcd plot_pilotUse the Yeoman generator to generate the manifest file for your Add-in.
bashyo office
When prompted, provide the following information to create your Add-in project.
- Choose a project type:
Office Add-in project containing the manifest only - What do you want to name your Add-in?
PlotPilot - Which Office client application would you like to support?
Excel
After completion, the wizard creates a PlotPilot folder containing a manifest.xml file. You'll use the manifest to sideload and test your Add-in.
Clean Up
We need to rearrange some of the files.
The folder
plot_pilot/PlotPilot/assets/can be moved inplot_pilot/public/assets/The file
plot_pilot/PlotPilot/manifest.xmlcan be moved toplot_pilot/manifest.xmlEdit the plot_pilot/package.json file:
- Add
"office-toolbox"to the"dependencies"
json"dependencies": { ... "office-toolbox": "^0.1.1" }- Add the “validate” script to the scripts
json"scripts": { ... "validate": "office-toolbox validate -m manifest.xml" }- Add
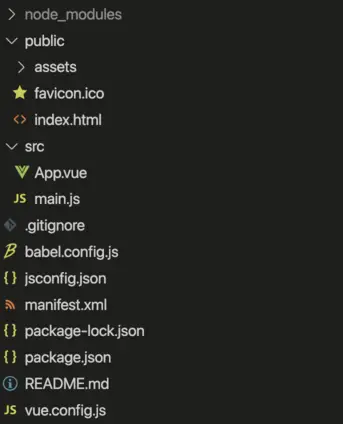
Delete the whole
plot_pilot/PlotPilot/folder, we do not need it anymore.Also delete the
plot_pilot/src/assets/andplot_pilot/src/components/folders, we do not need them anymore.Your folder structure should look like this:
Secure the app
While not strictly required in all Add-in scenarios, using an HTTPS endpoint for your Add-in is strongly recommended. Add-ins that are not SSL-secured (HTTPS) generate unsecure content warnings and errors during use. If you plan to run your Add-in in Office on the web or publish your Add-in to AppSource, it must be SSL-secured. If your Add-in accesses external data and services, it should be SSL-secured to protect data in transit. Self-signed certificates can be used for development and testing, so long as the certificate is trusted on the local machine.
Enable HTTPS for your app. In the root folder of the Vue project, open the vue.config.js file and replace the file contents with the following code.
javascriptconst fs = require("fs"); const path = require("path"); const homedir = require('os').homedir() module.exports = { devServer: { port: 3000, https: { key: fs.readFileSync(path.resolve(`${homedir}/.office-addin-dev-certs/localhost.key`)), cert: fs.readFileSync(path.resolve(`${homedir}/.office-addin-dev-certs/localhost.crt`)), ca: fs.readFileSync(path.resolve(`${homedir}/.office-addin-dev-certs/ca.crt`)), } } }Install the Add-in's certificates for all users on your machine valid for 30 days.
bashnpx office-addin-dev-certs install --machine --days 30
Explore the project
Open the Code in VSCode or any other IDE.
The manifest.xml file in the root directory of the project defines the settings and capabilities of the Add-in. To learn more about the manifest.xml file, see Office Add-ins XML manifest.
You can change the Display name and description for the Add-in here I change a couple Resources in the
<bt:ShortStrings>tagxml<bt:ShortStrings> <bt:String id="GetStarted.Title" DefaultValue="Generate awesome Plots!" /> <bt:String id="CommandsGroup.Label" DefaultValue="Nicolas Add-ins" /> <bt:String id="TaskpaneButton.Label" DefaultValue="Plot Pilot" /> </bt:ShortStrings>
The ./src/App.vue file contains the HTML markup for the task pane, the CSS that's applied to the content in the task pane, and the Office JavaScript API code that facilitates interaction between the task pane and Excel.
Update the app
Open the
./public/index.htmlfile and add the following<script>tag immediately before the</head>tag.html<script src="https://appsforoffice.microsoft.com/lib/1/hosted/office.js"></script>Open
*manifest.xml*and find the<bt:Urls>tags inside the<Resources>tag. Locate the<bt:Url>tag with the IDTaskpane.Urland update itsDefaultValueattribute. The newDefaultValueishttps://localhost:3000/index.html. The entire updated tag should match the following line.html<bt:Url id="Taskpane.Url" DefaultValue="https://localhost:3000/index.html" />Open
*./src/main.js*and replace the contents with the following code.javascriptimport { createApp } from 'vue' import App from './App.vue' window.Office.onReady(() => { createApp(App).mount('#app'); });Open
./src/App.vueand replace the file contents with the following code.html<template> <div id="app"> <header class="header"> <h2>Welcome to Plot Pilot</h2> </header> <main class="content"> <h3>This is a simple Vue.js Office Add-in app to demonstrate basic styling and structure.</h3> <p>Highlight a couple of Cells in the Worksheet and color them by clicking the button.</p> <button class="button" @click="onSetColor"> <svg class="icon" xmlns="http://www.w3.org/2000/svg" viewBox="0 0 24 24" fill="currentColor"> <path fill-rule="evenodd" d="M20.599 1.5c-.376 0-.743.111-1.055.32l-5.08 3.385a18.747 18.747 0 0 0-3.471 2.987 10.04 10.04 0 0 1 4.815 4.815 18.748 18.748 0 0 0 2.987-3.472l3.386-5.079A1.902 1.902 0 0 0 20.599 1.5Zm-8.3 14.025a18.76 18.76 0 0 0 1.896-1.207 8.026 8.026 0 0 0-4.513-4.513A18.75 18.75 0 0 0 8.475 11.7l-.278.5a5.26 5.26 0 0 1 3.601 3.602l.502-.278ZM6.75 13.5A3.75 3.75 0 0 0 3 17.25a1.5 1.5 0 0 1-1.601 1.497.75.75 0 0 0-.7 1.123 5.25 5.25 0 0 0 9.8-2.62 3.75 3.75 0 0 0-3.75-3.75Z" clip-rule="evenodd" /> </svg> <div>Color Me</div> </button> </main> </div> </template> <script setup> import { ref } from 'vue'; const teaGreen = ref('rgba(196, 241, 190, 1)'); const paynesGray = ref('rgba(82, 91, 118, 1)'); const spaceCadet = ref('rgba(32, 30, 80, 1)'); const onSetColor = () => { window.Excel.run(async context => { const range = context.workbook.getSelectedRange(); range.format.fill.color = '#a2c3a4'; await context.sync(); }); }; </script> <style> html, body { background-color: rgba(162, 195, 164, 1); } .header { background-color: v-bind("spaceCadet"); color: v-bind("teaGreen"); text-align: center; padding: 10px; font-size: 20px; } .content { padding: 20px; color: v-bind("spaceCadet"); } .button { background-color: v-bind("paynesGray"); color: v-bind("teaGreen"); border: none; padding: 10px 20px; cursor: pointer; font-size: 16px; display: inline-flex; align-items: center; border-radius: 10px; } .icon { margin-right: 10px; width: 24px; height: 24px; } </style>
Try it out
Start the dev server.
bashnpm run serveIn a web browser, navigate to
https://localhost:3000(notice thehttps). If the page onhttps://localhost:3000is blank and without any certificate errors, it means that it's working.Lets sideload the Excel Add-in on to the web:
- Go to https://www.office.com/launch/Excel and create a blank Workbook
- Select Home > Add-ins, then select More Add-ins.
- On the Office Add-ins dialog, select the MY ADD-INS tab, choose Upload My Add-in.
- Browse to the Add-in manifest file, and then select Upload. The file should be in
plot_pilot/manifest.xml - After a few seconds a new Item should appear in your Excel Home Bar.
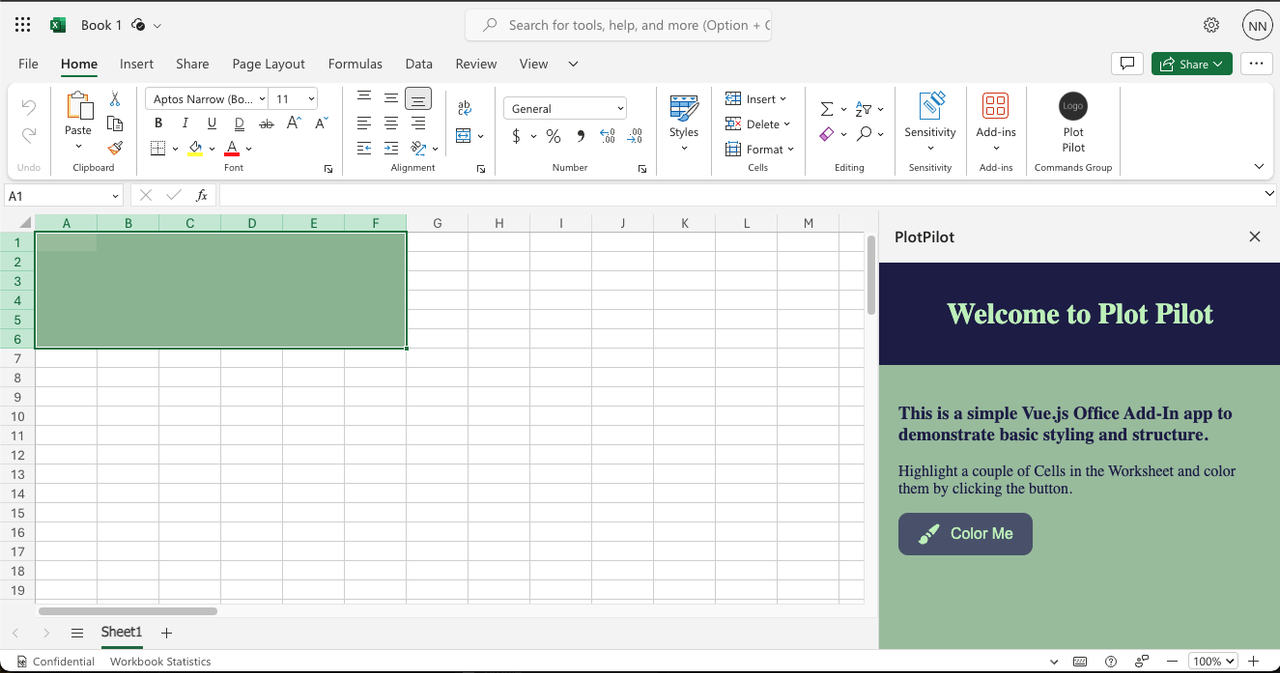
Open the Add-in task pane in Excel. On the Home tab, choose the Plot Pilot button.
Select any range of cells in the worksheet.

Set the color of the selected range to green. In your Add-in's task pane, choose the Set color button.
Resources:
Microsoft Tutorial on how to create Excel Add-ins: https://learn.microsoft.com/en-us/office/dev/add-ins/quickstarts/excel-quickstart-vue
Project GitHub link: https://github.com/heushreck/PlotPilot